Adding Custom bottom tab navigator in react-native
Today we are going to add a simple custom bottom tab navigator using reactnative.
Let’s create a new project name as customButtomTab using expo and expo start to start the expo server
In this expo project, let’s install all the dependencies required, as we are just focusing on creating the custom button, we will only install the required dependencies with the basic flow.
expo install react-native-gesture-handler react-native-reanimated react-native-screens react-native-safe-area-context @react-native-community/masked-view
expo add @react-navigation/bottom-tabs
expo add @react-navigation/native
Now, lets write our code in visual studio code. Open the app.js file and copy paste the following code.
import React from "react";
import { StyleSheet, Text, View, TouchableOpacity } from "react-native";
import { NavigationContainer } from "@react-navigation/native";
import { createBottomTabNavigator } from "@react-navigation/bottom-tabs";
const Tab = createBottomTabNavigator();
function HomeScreen() {
return (
Home!
);
}
function SettingsScreen() {
return (
Settings!
);
}
function CustomScreen() {
return (
Custom Screen
);
}
const CustomButton = ({ children, onPress }) => (
);
export default function MyTabs() {
return (
);
}
In line 1-5 we import all the required dependencies
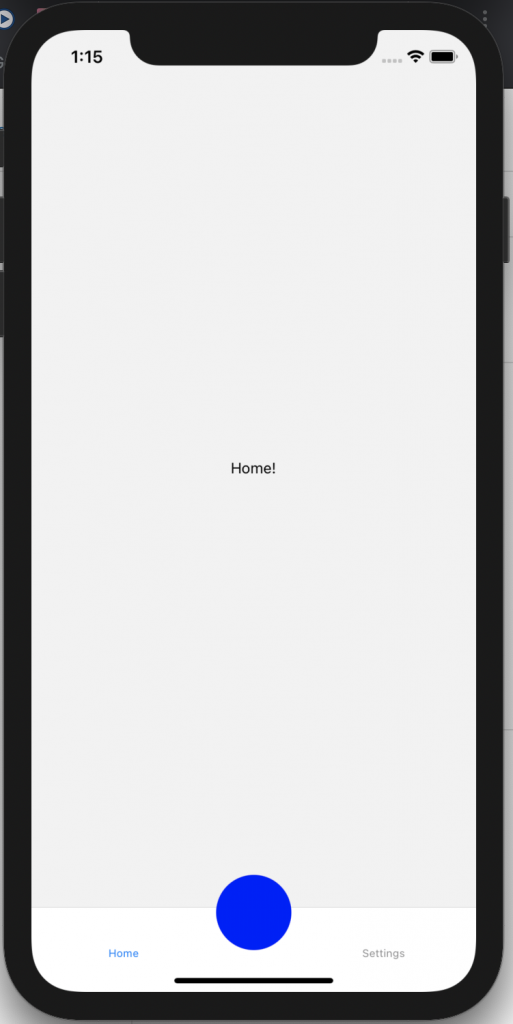
In line 9-15, we created a component called HomeScreen, which renders the Home page
In line 17-23, we created a component called SettingScreen, which renders the setting page
In line 25-31, we created a component called CustomScreen, which renders the custom page
In line 33 – 50, it shows our custom button. This is the basic button which I have shown, you can add your own design.
In line 52-68 , function named MyTabs is created, which shows our list of tabs and in the second tab we have added a field named tabBarButton inside options.
options={{
tabBarButton: (props) => Here, I have created a simple button at the center, this button can be created as per the requirement with this basic logic.
Please free feel the comment my post and provide feedback.
This is the github Link, where you can get all the link.
https://github.com/TriptiPant01/customtabButtonnavigatorReactnative