Django Image upload
This tutorial shows how to upload image in admin panel. We will show the basic setup for it.
Setup
Go to the terminal, and create a new repo
mkdir imageupload
cd imageupload
So let’s start by creating our very first virtual environment and installing Django.
Inside the imageupload folder install
virtualenv venv -p python3
Our virtual environment is created. Now before we start using it, we need to activate:
source venv/bin/activateYou will know it worked if you see (venv) in front of the command line, like this:

By the way, to deactivate the venv run the command below:
deactivateInstalling django
It’s very straightforward. Now that we have the venv activated, run the following command to install Django:
pip install django
pip install Pillow
To start a new Django project, run the command below:
django-admin startproject imageTestdjango-admin is automatically installed with Django.
Our, imageTest directory will look as a like below.
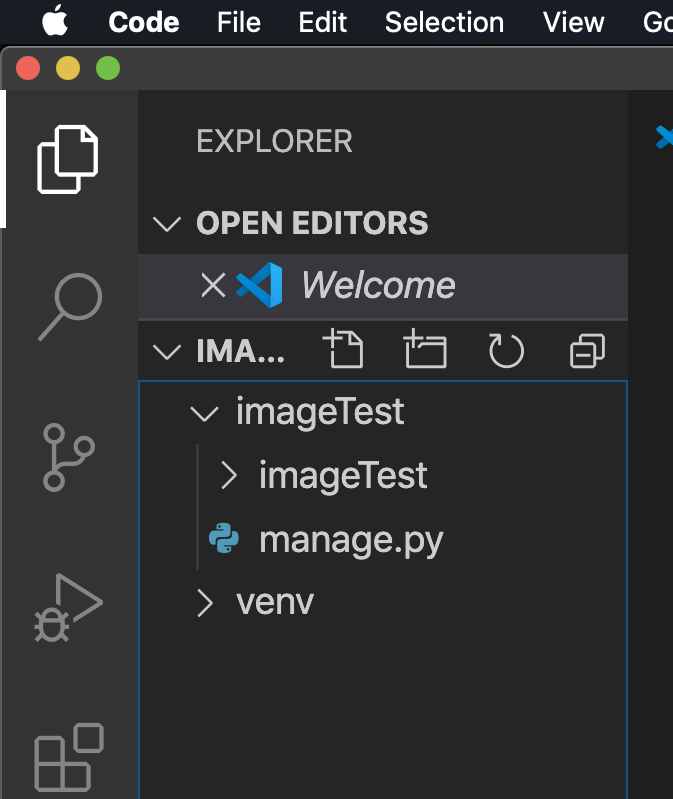
- manage.py: a shortcut to use the django-admin command-line utility. It’s used to run management commands related to our project. We will use it to run the development server, run tests, create migrations and much more.
- __init__.py: this empty file tells Python that this folder is a Python package.
- settings.py: this file contains all the project’s configuration. We will refer to this file all the time!
- urls.py: this file is responsible for mapping the routes and paths in our project. For example, if you want to show something in the URL
/about/, you have to map it here first. - wsgi.py: this file is a simple gateway interface used for deployment. You don’t have to bother about it. Just let it be for now.
Now, you can run the server using
cd imageTest
python manage.py runserver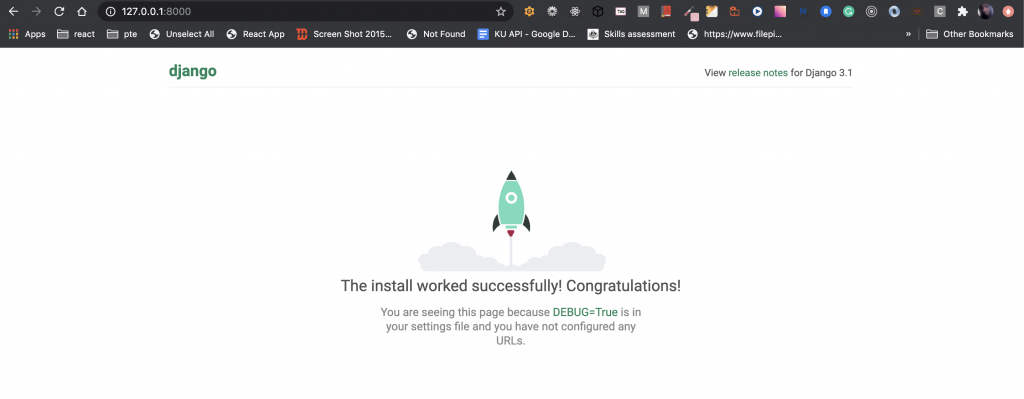
Lets create our first app
django-admin startapp itemsNow that we created our first app, let’s configure our project to use it.
To do that, open the setting.py and try to find the INSTALLED_APPS variable:
INSTALLED_APPS = [
    'django.contrib.admin',
    'django.contrib.auth',
    'django.contrib.contenttypes',
    'django.contrib.sessions',
    'django.contrib.messages',
    'django.contrib.staticfiles',
]
and add items to this list.
INSTALLED_APPS = [
    'django.contrib.admin',
    'django.contrib.auth',
    'django.contrib.contenttypes',
    'django.contrib.sessions',
    'django.contrib.messages',
    'django.contrib.staticfiles',
    'items',
]
Models
Starting with the database model is a good choice. In our case our model Item will only have two fields: topic and icon. We’ll also include a __str__ method below so that the topic appears in our Django admin later on.

The location of the uploaded image will be in MEDIA_ROOT/images. In Django, the MEDIA_ROOT setting is where we define the location of all user uploaded items. We’ll set that now.
If we wanted to use a regular file here the only difference could be to change
ImageFieldtoFileField.
MEDIA_ROOT
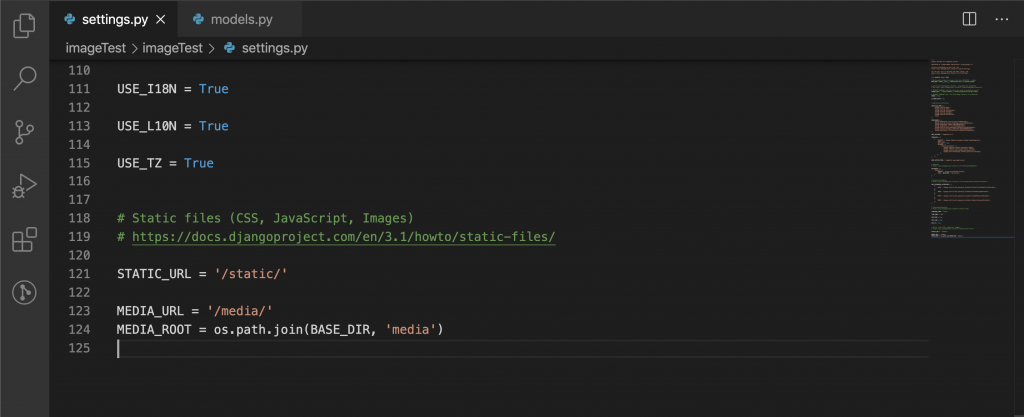
Open up imageTest/settings.py in your text editor. We will add two new configurations. By default MEDIA_URL and MEDIA_ROOT are empty and not displayed so we need to configure them:
MEDIA_ROOTis the absolute filesystem path to the directory for user-uploaded filesMEDIA_URLis the URL we can use in our templates for the files
Admin
Now update the items/admin.py file so we can see our Item app in the Django admin.
from django.contrib import admin
from .models import Item

admin.site.register(Item)
Setup Migration
python manage.py migrate ---- to setup the new database for our project
python manage.py makemigrations -- Generate a new migrations file.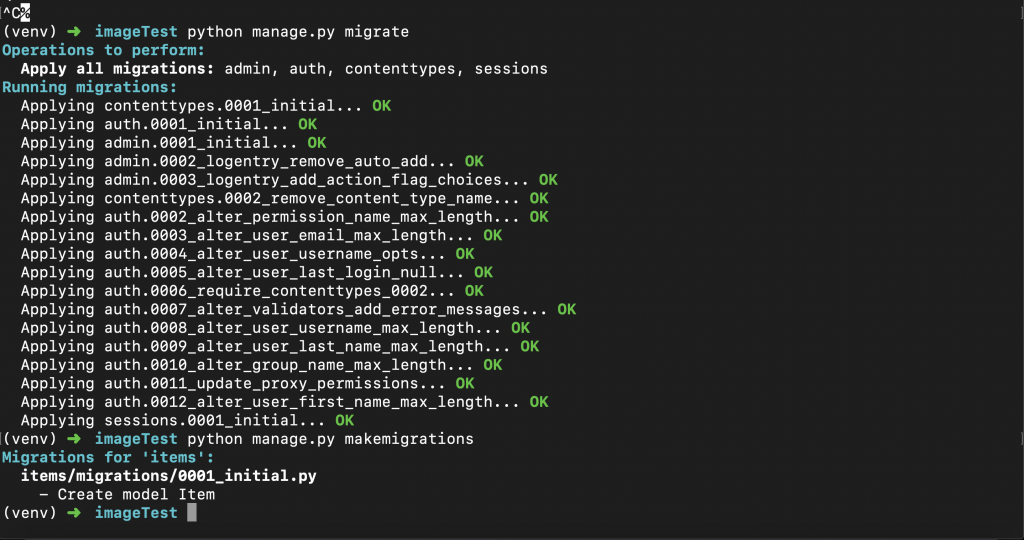
Now we can create a superuser account to access the admin.
python manage.py createsuperuserRun the server to start it.
python manage.py runserver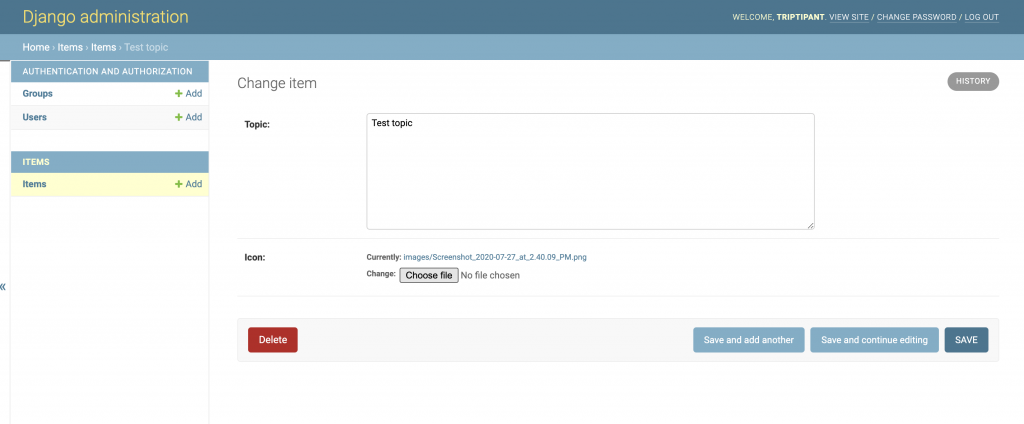
Conclusions
Here, we have successfully upload a new topic and a image.